Campaigns
Campaigns allow you to send bulk messages to contacts. You can send any kind of message, but be aware of WhatsApp's 24‑hour conversation window: only template messages can initiate a new conversation.
Step 1: Create the Campaign
Navigate to Campaigns from the sidebar and click the + icon to create a new campaign.
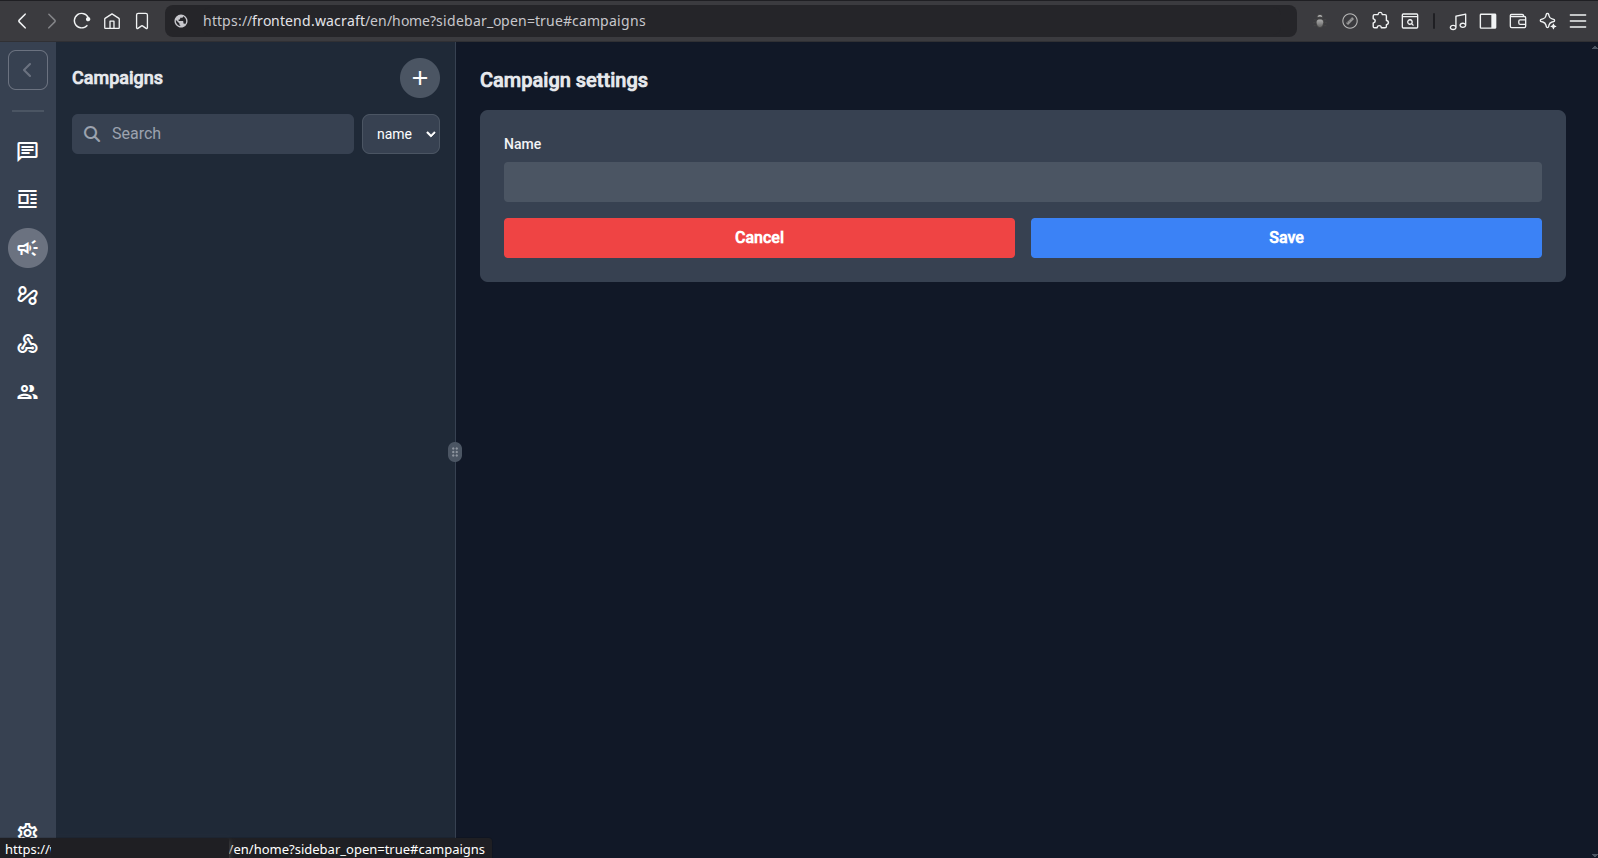
Give it a descriptive name and click Save.
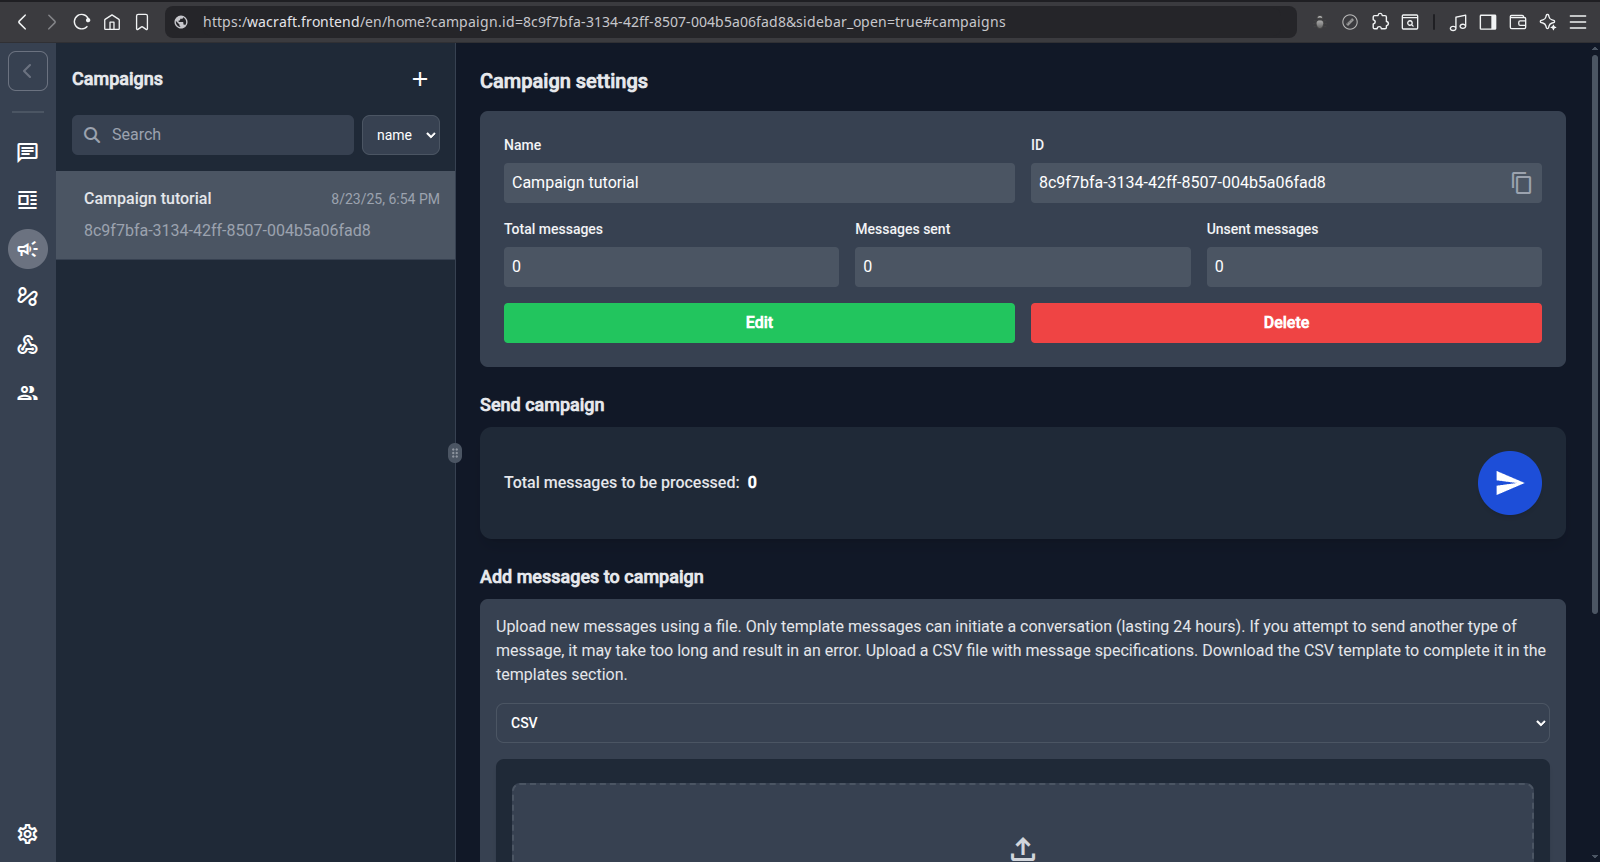
Step 2: Add Messages
There are two ways to add messages:
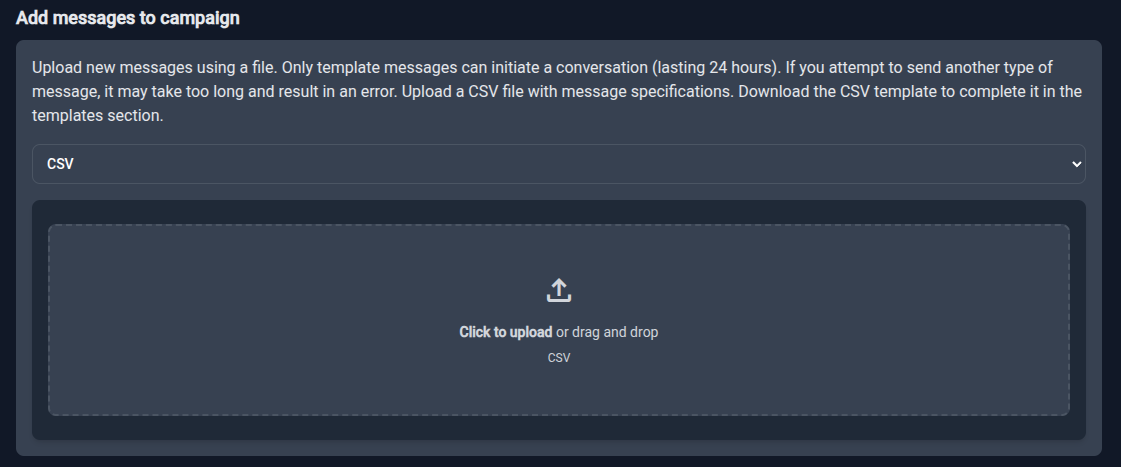
Method 1: CSV (Recommended)
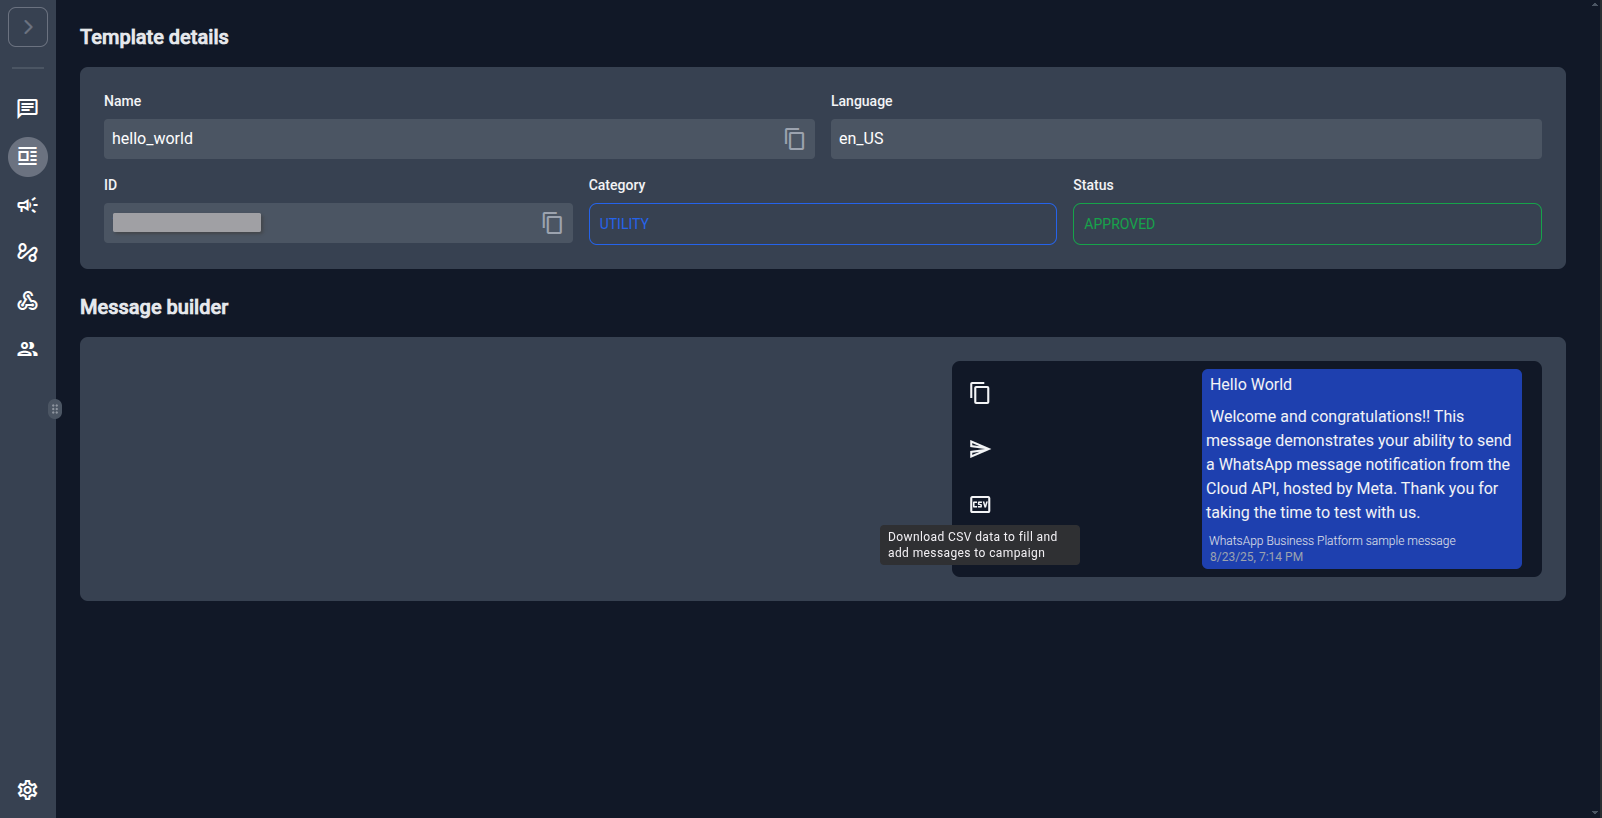
- Go to the Templates page and select the template you want to use.
-
Click the CSV icon to download a pre‑formatted CSV file.
-
Fill in the
tocolumn with phone numbers. If the template has variables, fill those columns too.csv messaging_product,recipient_type,to,type,template.name,template.language.code,template.components whatsapp,individual,5511999999999,template,hello_world,en_US,[] whatsapp,individual,5521888888888,template,hello_world,en_US,[] -
Return to the campaign page and upload the CSV in the Add messages to campaign section.
Method 2: Raw JSON
Select JSON and paste an array of WhatsApp message objects:
[
    {
        "recipient_type": "individual",
        "messaging_product": "whatsapp",
        "to": "5511999999999",
        "type": "template",
        "template": {
            "name": "hello_world",
            "language": { "code": "en_US" },
            "components": []
        }
    }
]
See the Meta API Reference for the full message format.
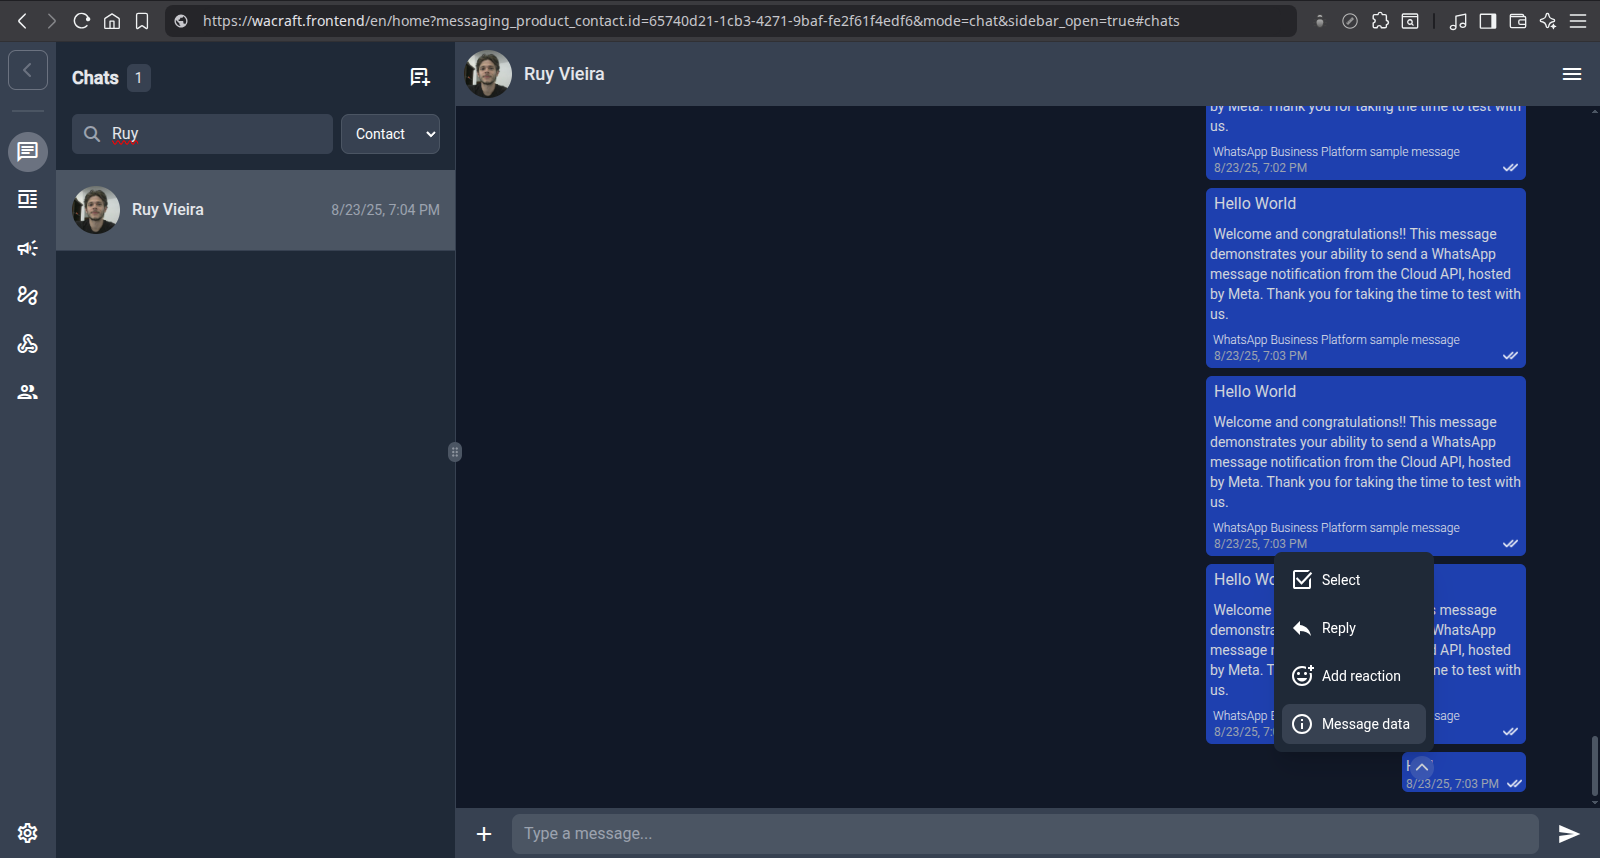
Tip: Send a message from the Chats page, click message options → Message data and copy the sender_data object.
Step 3: Send and Monitor
Click the blue Send ▶️ button. A progress graph appears in real time showing:
- Total – messages in the batch
- Handled – messages the server has processed
- Successes – messages accepted by Meta's API
- Errors – messages that failed (details visible in the list below)
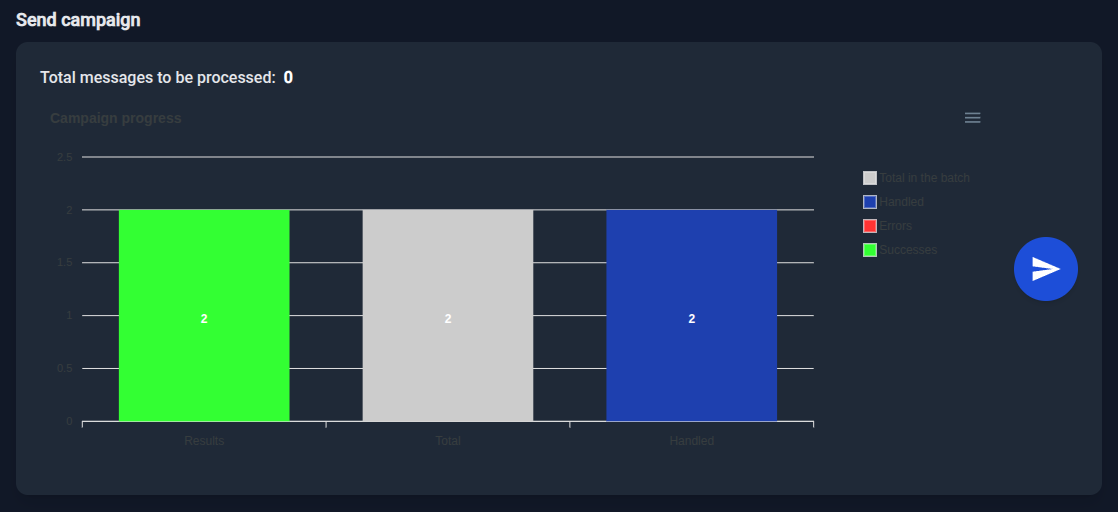
Note: "Success" means Meta's API accepted the message. For final delivery status, check the Chats page after some time. WhatsApp can still apply delivery restrictions based on your account status.
Required Policies
To create and run campaigns you need the following workspace policies:
| Action | Required Policy |
|---|---|
| View campaigns | campaign.read |
| Create/edit | campaign.manage |
| Send (run) | campaign.run |